This post contains affiliate links, which means I am compensated if you make a purchase using this link. Thank you for supporting my blog!
I love to give homemade bibs as a gift to new parents. Even though my son is six now, I remember how many bibs I would go through each day while trying to keep his clothes clean. I much preferred getting formula and food on the bibs rather than his clothes. After all, the bibs were cheaper than the clothes. When my son was little, we were stationed at a small town in Oklahoma. Walmart was just about the only place I could buy bibs (and truthfully, about the only place I could afford to buy them). I was not very happy with the selection I had to choose from, and I hated how rough they felt.
Making your own bibs gives you the option to personalize them however you want. You can make them reversible, add minky or chenille to the back, add a monogram, piece scraps together for a quilted bib, and the list goes on. I like to use my imagination and make each one a little different.
Getting started on the Basic Bib Tutorial you will need the following items.
Tools
Sewing machine
Cutting Mat
Rotary Cutter
Acrylic Ruler (Shape Cut is preferred)
Coordinating Thread
Straight Pins
Water soluble pen
Babyville Boutique Snap Pliers
Babyville Boutique sz 20 Snaps
Bib Template
Sharp scissors or pinking shears
Fabric
Regular bib- 1 piece 10″x12″ for front, 1 piece flannel 10″x12″ for back
Newborn bib- 1 piece 7.5″x11.5″ for front, 1 piece flannel 7.5″x11.5″ for back
Basic bib instructions:
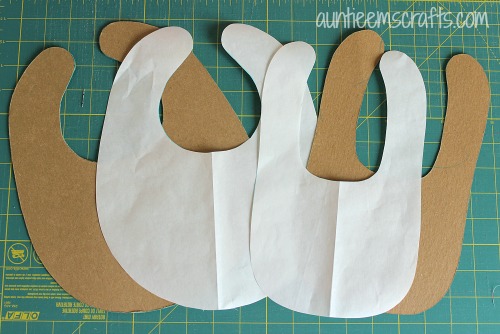
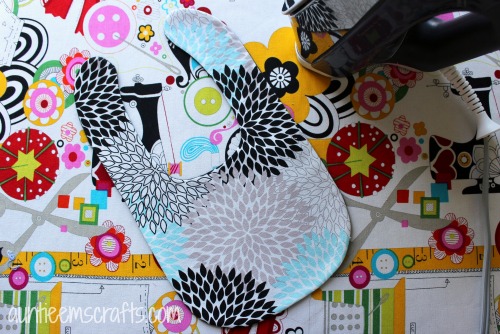
1. Print the bib template out for the size bib that you’d like to make, either regular size or newborn. Cut out the template and trace it onto freezer paper, chipboard (an old cereal box), or stencil material. Using stencil material or freezer paper will allow you to see the fabric patterns underneath the template, which is helpful with images on the fabric that need to be kept straight. Cut the new template out.
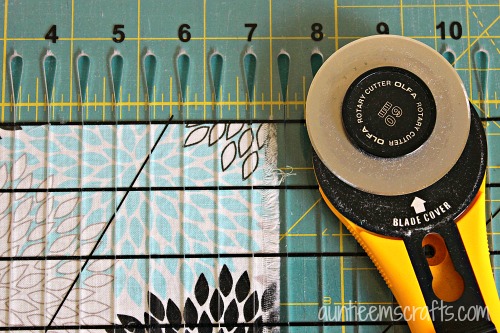
2. Cut your front and back fabric pieces to size using your cutting mat, rotary cutter, and acrylic ruler.
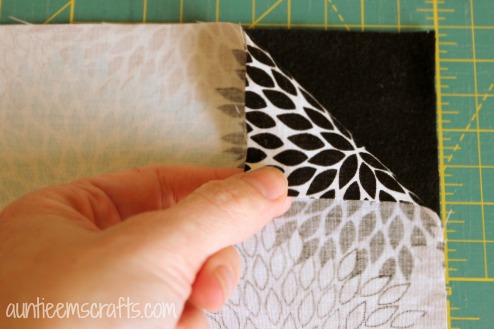
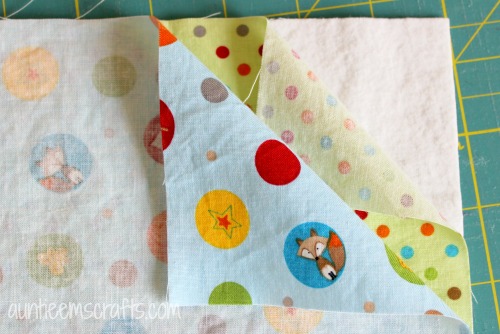
3. Place your flannel on your work surface. Place your front fabric on top, right side down.
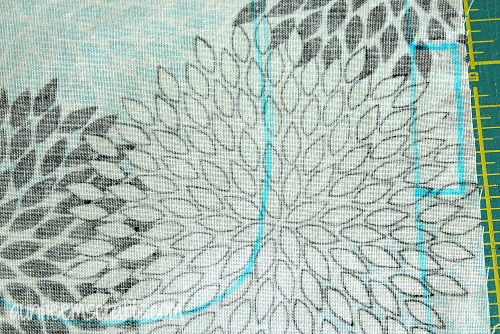
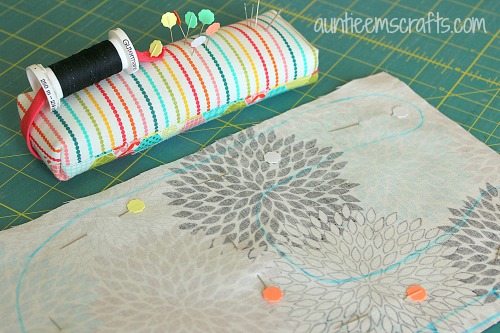
4. Set your bib template on top of the fabric. Ensure the template is straight and that it is .25″-.5″ away from all edges. Trace around the bib template with your water soluble pen. Draw a rectangle opening on one side of the bib that is approx 2″ tall and .5″ wide.
5. Carefully pin the layers together, placing a pin every few inches.
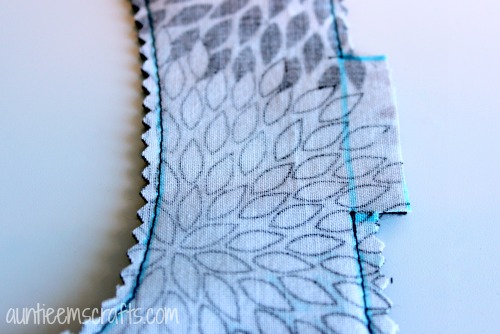
6. At your sewing machine, you will start sewing at the bottom of the opening you drew. If you have a fix button on your machine, select that so that the thread sews in the same place for several stitches. If you do not have that feature, you will want to sew forward, back-stitch until the opening line, then sew forward again. Stop sewing at the top of the opening and fix/back-stitch again.

7. Cut approximately .25″ away from where you sewed. Be careful not to cut through your stitching. Cut on the outside of rectangle line that you drew earlier.
8. Slowly flip the bib right side out through the opening. Use a pointy object such as a bone folder (scrapbooking tool), that purple thang (sewing tool), or an unsharpened pencil to help around the curves.
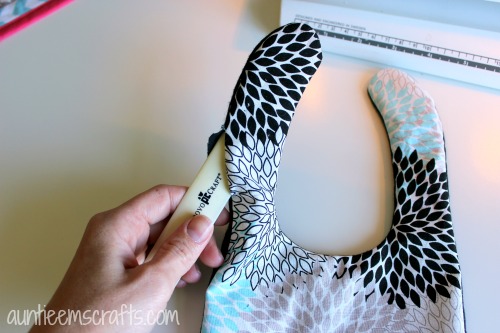
9. Iron the bib flat. Fold the rectangle to the inside of the bib and iron it.
10. Top stitch all the way around the bib, close to the edge. I use my zipper foot to sew about 1/8″ away from the edge. Be sure to go slow, as this is the hardest part of making the bib. You can skip this step and hand-sew the opening shut if you’d like but it really gives the bib a profession look.
11. Tie the thread in a knot on the front and back of the bib where you started and stopped sewing.
Snap instructions:
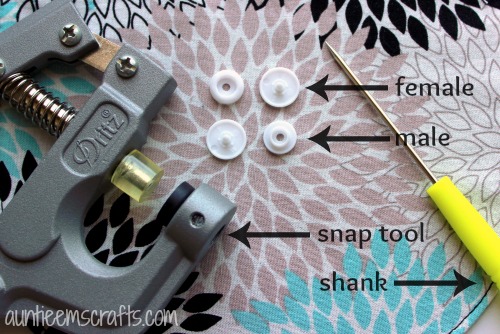
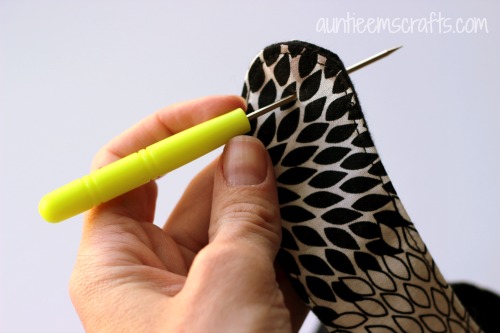
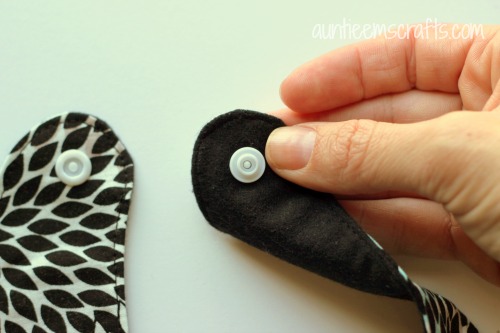
12. Using the shank tool that comes with the Babyville kit, poke a hole through the fabric on both sides where the snap will go.
13. Insert the base of the snap into the back of the left hole and place the female part of the snap on the front side.
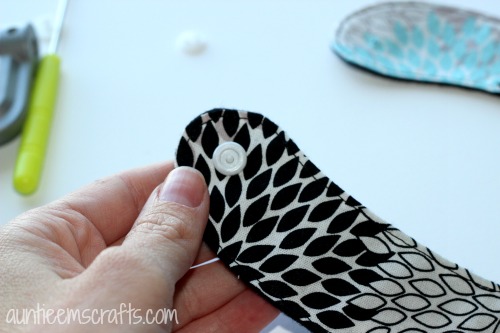
14. Use the snap tool to clamp the snap. To keep the snap from breaking, first squeeze the snap tool half way down, then all the way.

15. Repeat with the male side of the snap on the right side of the bib. Make sure you put the base of the snap on the front side this time.
Easy, right?! Once you have mastered this basic bib, try out other variations.
Reversible bib:
1. Cut a front, back, and flannel lining piece to size using your cutting mat, rotary cutter, and acrylic ruler.
2. Place your flannel on your work surface. Place your back fabric on top of the flannel, right side up. Now place your front fabric on top, right side down.
3. Follow steps 4-15 above.
Add an applique:
Adding an applique looks best on a bib that is not meant to be reversible. I like to use letters, the number 1, a mustache, anchor, or any cute silhouette that I can find in my fonts. You can also do an Internet search for a silhouette image. Iron fusible interfacing, such as Wonder Under, to the back side of fabric for the applique. Peel the paper layer off. Trace the image onto the interfacing and cut it out with sharp scissors. Place the applique where you would like it to be and press with the iron. Top stitch with a blanket stitch, satin stitch, or 1/8″ away from the edge for raw edge applique.
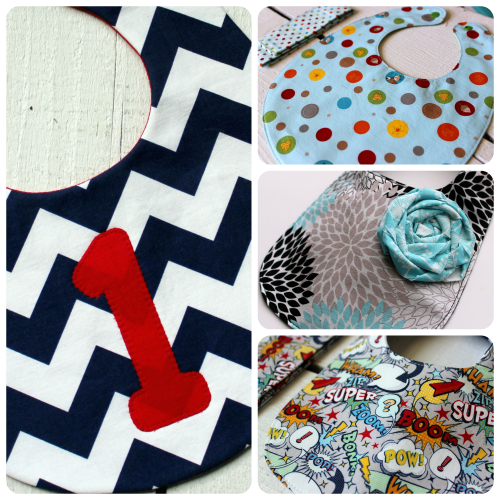
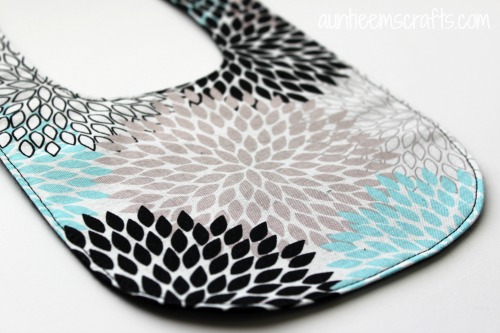
I used Andrea Victoria Aqua Flowers for my newborn bib and Fox Trails for my reversible regular sized bib. The navy chevron bib has solid pepper for the one and backing. My Superhero Words bib is a newborn size and is reversible with navy chevrons on the back. All fabrics used are from Riley Blake. Some bibs are available for purchase in my Etsy store.
I hope you enjoy this project. Each bib will take approx. 30 minutes to one hour to make. Not bad for a cute, custom baby gift!
PS- If you want to add a binky holder to the bib, check out this tutorial.
Awwwww! Love those bibs! Really cute and clever! 🙂
Love this bib and will make lots of them in pink! Thank you!
Newborn and baby bib pattern with “printable” template . Could not find “printable template” Like the pattern but really would like to have template. Instruction #1 is “PRINT” template, when click on “PRINT” just get sent to another site for printing coupons. Does anyone have the answer??
Sorry for the confusion, Kay. Here is the direct link to the template: http://52.43.193.142/wp-content/uploads/2014/08/Bib-Template.pdf
That isn’t working for me either 🙁
Jessica, click here for the direct pattern link: http://52.43.193.142/wp-content/uploads/2014/08/Bib-Template.pdf
Link doesn’t work 🙁
Doesn’t work for me either, over a year later!
Have you tried this link? http://www.auntieemscrafts.com/wp-content/uploads/2014/08/Bib-Template.pdf
Thank you so much, I have been trying to find a pattern for bibs for our women’s shelter. It will be put to good use many times over.
I have been making bibs fir quite sime time, but this method is sooo much better! Can’t believe I didn’t think of it! Thank you so much for sharing.
Applique before Sewing the 2 sides together .
it says to print either regular or for newborn, how do you get the different size templates?
When you click on the template, there are two pages, one for each bib size.
So which size is the pattern , newborn or ??
Hi LaDonna. When you print the pattern it will show two different sizes. The “newborn” size will fit the babies for at least 6 months though. (My husband fit it around his neck, so maybe even longer than that. Shh! Don’t tell him I told you that, LOL!)
Did you make your pin cushion? I love it!
Also, for the bibs, the newborn bib looks like the neck opening is very large compared to some I’ve seen. Have you tried it on a newborn? Seems like it would hang too low and not even catch the drool/spit-up.
Which pincushion?
I put a bib on my baby when he was 10 weeks old and it was fine. (He is four months now). You could cut a little off the pattern on both sides then tape it back together before tracing it on the fabric, say 1/4-1/2″.
Oh the one in the post? Yes I did. That is the pincushion from the Sit and Stitch pattern. I use it all the time! You can find the pattern in my AuntieEmsCrafts Etsy store.
If any one is concerned that the neck is too large for a newborn simply add a second bottom snap a little further along to give two fittings (not too far so it chokes). One for younger baby and the slightly larger for the older
Excellent idea, Patricia.
Thank you so much for providing a pattern. It’s been too many years since I had babies for me to guess how large or small the inside edge of the bib should be! I’ve made 6 in newborn size so far and planning at least 12 of each size.
HI EMILY
CAN YOU PLEASE TELL ME WHAT SIZE DOES THE REGULAR BIB FIT
THANKS
ANASTASIA
Hi there. I would say 9 months and older, though it really depends on the size of the baby.
Can’t get pattern,,when I close click on link it doesnt do anything . Help !!!!! Thank you for tutorial. Michele
Are you clicking where it says Bib Template?
Thank you for sharing the pattern. i love it for our Church craft sale.
The direct link for the bib templates isn’t working. Would you repost, please? Thanks so much!
What size is the seam allowances on your bib pattern?
There isn’t a seam allowance, per se, because you sew directly on the line that you draw with the template.
Help! I can’t get the link to open for the pattern. 🙁
Here is the direct link to the pattern: http://www.auntieemscrafts.com/wp-content/uploads/2014/08/Bib-Template.pdf
This link works. The other two previously posted do not work.
Thank you
Everyone, use this link http://www.auntieemscrafts.com/wp-content/uploads/2014/08/Bib-Template.pdf
Sew after tracing, then cut the fabric? Wow. So smart. I’m embarrassed to admit I haven’t done anything like that in years. Now I’m going to do it a lot more in unique ways on all kinds of projects. That tip alone is worth gold, and thanks for the bib template and instructions too. You made my day, and I’m going to think of you every time I “sew first, cut later.” It will save me a lot of time. As I said, “Wow.”
Thank you for this wonderful tutorial. My plan is to make these for the pediatrics ward at Walter Reed Medical Center. Very excited to make them.
Thank you so much for the free pattern and tutorial. Making one for a coworker now!!
Love this for my neices and nephews!